Last week I started a monthly menu hoping to solve the dilemma of opening the fridge to find lots of food but nothing to eat. I'm toying with the idea of making 3-4 months worth of menu's and then cycling through them, but I'm not sure yet. So far it's worked out great. We used all the food in our fridge, and always had great nutritious, tasty, and different things to eat. Other blogs I follow post their weekly menu's in order to get ideas from others about what to make and share their menu's with the rest of the blogging world for others to get ideas from them. I can always use a little inspiration when planning my menu to avoid the rut I sometimes get in, so here's our menu for this week (feel free to share any ideas you have too!):
Sunday:
Lunch: Leftovers
Dinner: Layered Applesauce, Fresh Berries, Kiwi, Yogurt
Monday:
Lunch: Masterful Mac n Cheese (from the Sneaky Chef Cookbook), Veggies, and Grapes
Dinner: Veggie Chicken Chopped Salad
Tuesday:
Lunch: IQ Tuna Patties (from the Sneaky Chef Cookbook), Raisins, Veggies
Dinner: Sweet Potato and Black Bean Chili and Spinach Salad
Wednesday:
Lunch: Leftovers
Dinner: Enchilada's and Broccoli
Thursday:
Lunch: Leftovers
Dinner: Teriyaki Tofu, Green Beans, Rice
Friday:
Lunch: SLT Sandwiches, carrots, fruit
Dinner: Minestrone Soup and Corn Dodgers
Saturday:
Lunch: Special K Roast, Green Beans, Salad, Bread
Dinner: Open Kitchen
Showing posts with label Cooking. Show all posts
Showing posts with label Cooking. Show all posts
Monday, November 1, 2010


Monday, October 4, 2010
Applesauce Conversion
My house smells delicious. Apples, sugar, and cinnamon cooking on the stove make it feel even more like fall. This morning while K was eating breakfast, I peeled, cored, and chopped 28 apples to try my hand at my first ever solo batch of freezer applesauce. I’ve made applesauce before, but it’s usually only enough for what I needed at the moment. I’ve also “helped" my mom make quarts of canned applesauce as a kid and swore I would never have any part of it after I became an adult. It felt like pure torture to be trapped in a kitchen for hours and hours peeling, coring, slicing, boiling, and canning apples.
My mom has an addiction to canning and freezing. (If you're reading this mom, then I mean it only in the best possible way of course :-) During my childhood years we canned a wide variety of vegetables, jams, tomatoes, sauces, even grape juice! We also froze fruit and other sauces. But it wasn’t that we canned or froze these things that made me loathe it. It was the sheer quantity. Imagine being elbow deep in cherries, washing and pitting for what seemed like an eternity. My fingers, hands, and arms were stained a deep red that would last for days and almost all feeling in the tips of my fingers were gone for the same amount of time. We didn’t use cherry pitters, we used our fingers to pry each and every pit from the 160 pounds (YES, ONE HUNDRED AND SIXTY POUNDS) of cherries. Just when I thought I never wanted to see another cherry again, another box of u-picked cherries (which we had spent the entire morning picking) would plop next to the sink for us to wash and pit. It was the same with strawberries, peaches, tomatoes, green beans, berries of all kinds, and so many more that I've forgotten. Thus, in that kitchen, beneath pounds of fruit and vegetables, my aversion was born.
In the summers there were the 4 of us girls and my mom home everyday. So regularly we’d pile into the van, drive to a local grower, pick fruit or vegetables all morning, and come home to clean, cut, prepare, and can or freeze them. We rarely picked less than 100 pounds and we never got out of the chore of preparing them no matter how creative our excuses (and we came up with some pretty good ones!). Although I have to say, we enjoyed the fruit of our labor all year and the homemade spaghetti sauce we routinely made was the best I’ve tasted.
I have canned a few times with my mom since I’ve been married, but only on the condition that we do a much scaled down version from my growing up years. I have never canned or frozen applesauce since those days until today. I picked a very simple recipe I found online and multiplied it by 7 since I wanted to use around 30 apples. Here’s the original recipe from Allrecipes.com:
4 apples - peeled, cored and chopped
3/4 cup water
1/4 cup white sugar
1/2 teaspoon ground cinnamon
Directions:
In a saucepan, combine apples, water, sugar, and cinnamon. Cover, and cook over medium heat for 15 to 20 minutes, or until apples are soft. Allow to cool, then mash with a fork or potato masher.
Pretty easy. The applesauce tastes great. I’ll probably keep looking for more applesauce recipes until I find a can’t-live-without-it one. BTW, thanks mom for the introduction to canning and freezing. I do sincerely appreciate it now that I’ve had over 15 years to recover ;-)


Sunday, September 19, 2010
Delicious Turkey Recipe
In honor of Kai's brother's long belated birthday, we had a turkey dinner yesterday. It's what he asked for this year after the turkey dinner we had for the holidays. I don't cook meat at home very often because I'm nervous it won't turn out. We're not completely vegetarian, but were for many years and so I never really became skilled at cooking meat. We mainly eat vegetarian at home, but I cook salmon once in a while and then about once a year a turkey. I was terrified the first time I cooked a turkey at home. I meticulously followed the recipe to make sure I wouldn't ruin it. After all, a turkey dinner is a fairly large undertakting for someone who doesn't regularly cook meat. So many people were counting on a nice turkey dinner, and it was up to me to deliver it. Talk about a nail biting experience! Thankfully my first experience was a success.
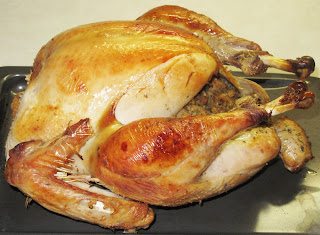

Last year I looked around for a different recipe because I've heard people talk of all different ways to cook a bird and wanted to try something different. I stumbled onto Martha Stewart's page and found a great recipe. The secret to this one is really 2 parts: first of all it soaks in a seasoned Riesling brine for 24 hours which cleans, moistens, and flavors the the turkey. It's probably the most moist turkey I've ever had. But that is also in part due to the second step which requires covering the turkey with a soaked cheesecloth and basting every half an hour. The cheesecloth turns completely black and I thought for sure I was ruining the turkey the first time I made it, but when I took it off, the turkey was beautifully golden and so extremely moist. So, here's the recipe. It's pretty long and detailed. The first step is the brining, then of course the baking. It uses a Riesling brine mixture that completely cooks out while the turkey is baking but gives it a nice flavor.


Happy Baking!!
Ingredients
Makes enough brine for one 18- to 20-pound turkey
7 quarts (28 cups) water
1 1/2 cups coarse salt
6 bay leaves
2 tablespoons whole coriander seeds
1 tablespoon dried juniper berries
2 tablespoons whole black peppercorns
1 tablespoon fennel seeds
1 teaspoon black or brown mustard seeds
1 fresh whole turkey (18 to 20 pounds), patted dry, neck and giblets reserved for stock, liver reserved for stuffing
1 bottle dry Riesling
2 medium onions, thinly sliced
6 garlic cloves, crushed
1 bunch fresh thyme
Tools and Materials 5-gallon brining container (tub, stockpot, or bucket)
Large brining or oven-roasting bag
Refrigerator (or a cooler with ice)
Step 2: Cooking the Turkey:
Step 1: Brining the Turkey:
What You'll Need:
Soaking a turkey overnight in a solution of salt and water ensures moist results. When you add aromatics to the brine, the resulting roast is also infused with a subtle character all its own. Follow our instructions to prepare a perfect brined turkey for your next feast.Ingredients
Makes enough brine for one 18- to 20-pound turkey
7 quarts (28 cups) water
1 1/2 cups coarse salt
6 bay leaves
2 tablespoons whole coriander seeds
1 tablespoon dried juniper berries
2 tablespoons whole black peppercorns
1 tablespoon fennel seeds
1 teaspoon black or brown mustard seeds
1 fresh whole turkey (18 to 20 pounds), patted dry, neck and giblets reserved for stock, liver reserved for stuffing
1 bottle dry Riesling
2 medium onions, thinly sliced
6 garlic cloves, crushed
1 bunch fresh thyme
Tools and Materials 5-gallon brining container (tub, stockpot, or bucket)
Large brining or oven-roasting bag
Refrigerator (or a cooler with ice)
Step 2: Cooking the Turkey:
- 2 carrots, cut into 2-inch pieces
- 2 parsnips, cut into 2-inch pieces
- 2 celery stalks, cut into 2-inch pieces
- 1 onion, cut into 6 wedges
- 2 white turnips, quartered
- 1 1/2 cups unsalted butter (3 sticks), melted, plus 4 tablespoons, at room temperature
- 1 bottle dry white wine
- 2 teaspoons coarse salt
- 2 teaspoons freshly ground pepper
Directions
- Remove turkey from brine. Discard brine. Pat turkey dry inside and out with paper towels. Place carrots, parsnips, celery, onion, and white turnips in bottom of a roasting pan. Place turkey, breast side up, on a rack set in a roasting pan. Fold wing tips under turkey. Let stand at room temperature for up to 2 hours.
- Place rack on lowest level in oven. Heat oven to 450 degrees. Combine melted butter and white wine in a bowl. Fold a large piece of cheesecloth into quarters and cut into a 17-inch, 4-layer square. Immerse cheesecloth in the butter and wine; let soak.
- Sprinkle 1/2 teaspoon salt and pepper inside turkey. Fill large cavity loosely with as much stuffing as it will hold comfortably; do not pack tightly. (Cook remaining stuffing in a buttered baking dish at 375 degrees.) Tie legs together loosely with kitchen string (a bow will be easy to untie later). Fold neck flap under and secure with toothpicks. Rub turkey with the softened butter and sprinkle with remaining 1 1/2 teaspoons salt and pepper.
- Lift cheesecloth out of liquid and squeeze it slightly, leaving it very damp. Spread it evenly over the breast and about halfway down the sides of the turkey; it can cover some of the leg area. Place turkey, legs first, in oven. Cook for 30 minutes. Using a pastry brush, baste cheesecloth and exposed parts of turkey with butter and wine. Reduce oven temperature to 350 degrees and continue to cook for 2 1/2 more hours, basting every 30 minutes and watching pan juices; if the pan gets too full, spoon out juices, reserving them for gravy.
- After the third hour of cooking, carefully remove and discard cheesecloth. Turn roasting pan so that the breast is facing the back of the oven. Baste turkey with pan juices. If there are not enough juices, continue to use the butter and wine. The skin get fragile as it browns, so baste carefully. Cook 1 more hour, basting after 30 minutes.
- After the fourth hour of cooking, insert an instant-read thermometer into the thickest part of the thigh. Do not poke into a bone. The temperature should reach 180 degrees (stuffing should be between 140 degrees and 160 degrees) and the turkey should be golden brown. The breast does not need to be checked for temperature. If legs are not yet fully cooked, baste turkey, return to oven, and cook another 20 to 30 minutes.
- Transfer turkey to a platter, reserving pan juices. Let turkey stand 30 minutes before carving.
Tuesday, May 4, 2010
My Rite of Passage
Since coming here I’ve tried my hand at making wheat rolls. However, it’s time for a confession: although I love cooking and baking and have made everything from Pad Thai to Spanakopita and more, I had actually never made bread before. Gasp! I know, I know. How can I truly be a woman, right? I regularly make sweet breads like banana, zucchini, etc., and love to cook and bake when I have the time, but when it comes to rolls and bread, I’ve always just bought the premade loaves in the nice preserving packaging or the Pillsbury rolls you take from the container, put on the baking sheet, and bake. So when I discovered there is nothing in the way of wheat bread here, I borrowed a recipe from one of the other missionary women and decided to try my hand at it. I wish I could say the first time I just whipped it together and voila, we had wheat rolls, but my first experience didn’t happen quite like that…
I was a little over zealous in my attempt to make big, fluffy, moist rolls, so when it called for warm water to be mixed with the yeast, I boiled the water because I don’t have warm water in the kitchen. I mixed in a little cool filtered water so it wasn’t boiling, but hot, and then added it to the yeast and honey. Yup! You know what happened next. I mixed it together and waited for the reaction with the yeast to take place. Nothing happened. I started preparing the second set of ingredients. Still nothing. I decided that enough time had passed, so I combined the 2 mixtures together, kneaded, and then formed the dough into rolls. I waited for them to rise…and waited…and waited. Finally I gave up and threw them into the oven thinking they would rise while baking. 20 minutes later, they were cooked, but still as flat and unfluffly as they were when I put them in. I was a little bummed, but decided to try one hoping they still tasted just as good. Hmmmm, the best way to describe them would be firm and chewy. Actually, chewy is a bit too generous—think physical therapy for your jaw. Most of those immediately found their way to the garbage can, the others were set outside to choke the rats (hee hee, j/k). When I found out that I had killed the yeast, I decided to try it again with warm water and that made ALL the difference. I now can make warm, moist, fluffy, soft, raised rolls!
Now that I have accomplished this great feat that most everyone else in the world (men and women alike) have achieved, I must say, there is something earthy, rustic, and gratifying about this simple task. There’s something to watching the yeast bubble and froth and then kneading the dough. I felt like I was living before my time when this novelty was an everyday occurrence. I felt a bizarre connection to all the women who have lived before me because I have now taken the leap and experienced what most other women have done for thousands of years. I’ve made bread!!!
-2.jpg)
Is this to say that when I head back to the U.S. that I will make all my bread from here on out and throw off the chains of modernization? Absolutely not!! I appreciate others hard work to make my life easier. I also LOVE to find a good deal and sometimes I can buy a $5 loaf of bread for $1 through sales and coupons, so I have a very similar feeling of gratification without actually needing to bake it myself. But if I find myself with a little extra time and the desire to do something as easy as it is timeless, you may find me mixing a little yeast with some warm water and honey and smiling at the reaction.
Here are a few more pictures of food preparation.

The start of a casserole. A delicious variety of colorful vegetables.

A little sauce mixture added. I'm not normally a complete vegetarian, but while we're here I am. Just look at the meat market pictures from my previous post and you'll understand.


Hot and steaming from the oven.

Banana bread
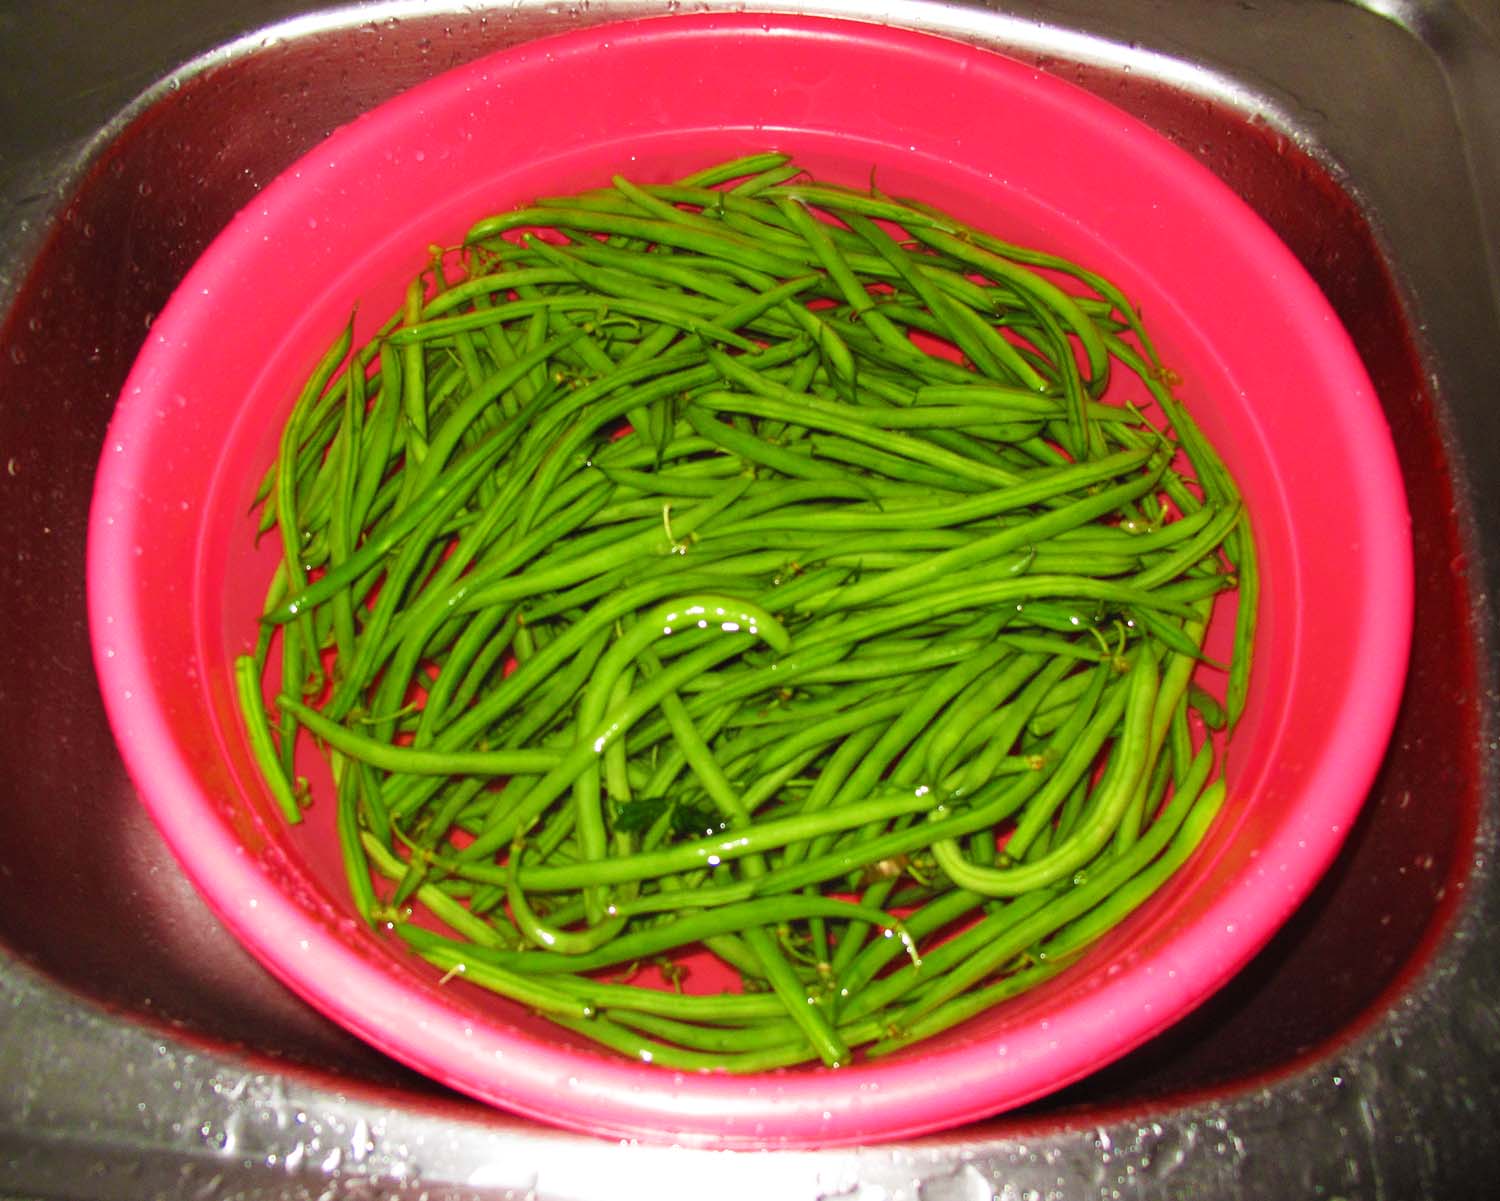
Cleaning the green beans. You have to soak everything in bleach water for 5-10 minutes to kill the bugs.

Fresh papaya--mmmmmmm!
-2.jpg)
And juicy pineapple

I also buy a bunch of flowers every week from a local stand outside the grocery store. The 2 men who sell to me have started to remember me, so I'm getting better deals :-)

Also, don’t forget about the giveaway that’s ending in a few days. If you haven’t signed up yet, click here to read how.
Subscribe to:
Posts (Atom)